
I started making chicken parm with thighs years ago because I was tired of babysitting breasts in a skillet, trying to keep them from drying out. Thighs are more forgiving, and honestly, I think they just taste better under all that cheese and sauce.
The trick is baking the panko-crusted thighs on a rack first so the coating gets properly crispy, then finishing them in a casserole with tomato sauce and mozzarella at high heat. The crust turns golden, the sauce bubbles up around the edges, and the cheese goes brown and bubbly on top. It's become one of those recipes I come back to repeatedly because it just works.
Jump to:
Why My Recipe Works

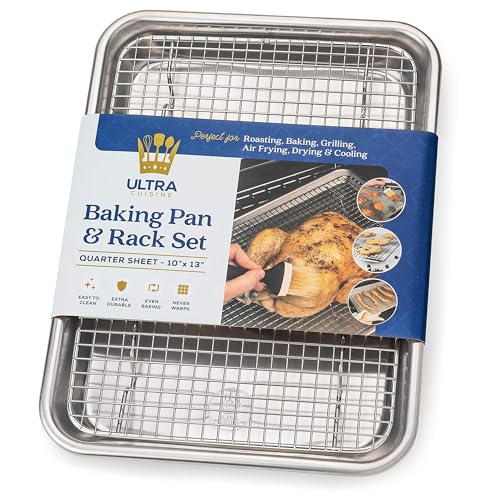
- Baking on a rack instead of frying - The wire rack lets hot air circulate around the chicken, crisping the panko coating on all sides without having to deal with the mess of deep-frying. You get an evenly golden crust with a fraction of the effort.
- Chicken thighs stay juicy where breast meat tends to dry out - Thighs have more connective tissue and intramuscular moisture, so they're far more forgiving if you overshoot the cook time by a few minutes. The result is tender, flavorful meat even after two rounds in the oven.
- A two-stage bake builds layers of flavor - The first bake at 350°F crisps the crust. The second at 500°F melts the cheese and reduces the sauce around the edges, concentrating the tomato flavor where it meets the chicken.
- Fresh herbs in the breading, not just on top - Mincing rosemary and thyme directly into the panko mixture means every bite of crust carries herby, savory flavor instead of relying on a garnish that falls off.

Ingredients
Key ingredients and why they matter
- Boneless skinless chicken thighs: Thighs hold up to the double bake without drying out, and their natural flavor stands up well to the bold tomato and parmesan. Look for thighs that are roughly even in thickness so they cook at the same rate. If some are much thicker than others, pound the thick parts a bit with the back of a chef's knife to even them out.
- Panko breadcrumbs: Panko has a coarser, flakier texture than regular breadcrumbs, which means more surface area for browning and a lighter crisper texture after baking. Standard breadcrumbs tend to compact and go soft in the oven. If you can't find it, you can make your own panko at home.
- Parmigiano-Reggiano: Mixed into the panko coating, the cheese melts into the breadcrumbs as they bake, creating a crust that's savory and crisp rather than just crunchy. Pre-grated parmesan from a shaker can work in a pinch, but it won't melt and bind the same way because of the anti-caking agents these processed cheeses contain.
- Fresh rosemary and thyme: These hardy herbs hold up well in the oven and add an aromatic depth to the crust that dried herbs can't match. Mince them finely so they distribute evenly through the panko. If fresh herbs aren't available, use about a third of dried rosemary and thyme, and chop or crush them.
- Tomato sauce: Four cups might seem like a lot, but the sauce serves as both a cooking medium and a serving sauce. It needs to be deep enough in the casserole to come partway up the chicken. A good homemade tomato sauce makes a real difference here since the sauce is front and center, but a quality jarred marinara works fine for a weeknight.
- Mozzarella: Goes on after the first bake, right before the high-heat finish. Low-moisture mozzarella melts more evenly and browns better than fresh mozzarella, which tends to release too much water and make the crust soggy. Grate it yourself for the best melt.

Prep Notes 🥣
- You want to bring the chicken thighs to room temperature before they go in the oven so they cook through more evenly. Fifteen minutes should be enough, so just bread the thighs and prep other things while you wait.
- Set up the breading station in order: flour, egg, panko mixture. Use one hand for dry ingredients and one for wet to keep the coating from clumping on your fingers.
- Line the baking sheet under the wire rack with foil or parchment for easy cleanup.
How to Make Parmesan Chicken Thighs
Bread and bake the chicken
Start by preheating your oven to 350°F and setting a wire cooling rack on a baking sheet. Mix the panko with the grated Parmigiano-Reggiano, minced rosemary, and thyme in a wide bowl.
Season the chicken thighs generously with salt and pepper on both sides, then dust them with flour, shaking off any excess. Dip each piece into the beaten egg, letting any extra drip off, then press it firmly into the panko mixture so the coating sticks on all sides. The flour-egg-panko sequence is what gives you a crust that actually holds together in the oven instead of sliding off.
Lay the breaded thighs on the wire rack with some space between them and drizzle a little olive oil over the top. The oil helps the panko brown and crisp since you're not frying them. Bake for 20 to 25 minutes, until the internal temperature hits 160°F and the coating is starting to turn golden.
TIP: Don't skip the wire rack. If you bake the chicken directly on a sheet pan, the bottom of the crust will steam against the hot surface and go soft. The rack gives you airflow on all sides for an evenly crispy result.
Build the casserole and finish
While the chicken bakes, heat your tomato sauce in a saucepan and get your pasta water going. Once the chicken is done, crank the oven up to 500°F.
Pour the hot sauce into a casserole dish, then nestle the baked chicken thighs on top. Sprinkle the mozzarella and an extra handful of parmesan over everything. The high heat does two things at once: it melts and browns the cheese into a bubbly golden layer while the sauce underneath reduces slightly and concentrates around the edges of the chicken.
SCIENCE🧪: The jump from 350°F to 500°F triggers the Maillard reaction on the cheese surface, creating those brown, slightly caramelized spots that add a nutty depth you don't get from a low, slow melt.
Pull it out when the cheese is golden brown and the sauce is actively bubbling. Serve over spaghetti with a scattering of fresh parsley.

What to Watch For
- Soggy crust: This usually happens when the chicken sits directly on the baking sheet instead of a wire rack, or when the sauce level in the casserole is too high and submerges the crust. Keep the sauce below the top of the chicken so the top crust stays above the liquid line.
- Coating that slides off: If the breading separates from the chicken after baking, the flour and egg layers weren't sticking properly. Make sure you shake off excess flour before the egg dip, and press the panko on firmly. Letting the breaded chicken rest on the rack for 5 minutes before baking also helps the coating set.
- Dry chicken: If the thighs come out dry, they were likely in the first bake too long. Pull them at 160°F internal, not 165°F. The temperature will rise a few degrees as they rest, and the second bake in the casserole brings them the rest of the way. The residual heat from the sauce helps keep them moist.
- Cheese that doesn't brown: Your oven might not be reaching 500°F, or the casserole is sitting too low in the oven. Move it to the upper third so the cheese is closer to the heating element. If it's still not browning after 5 minutes, switch to broil for the last minute or two, but watch it closely.
Storage and Reheating
The assembled chicken parm keeps well in the fridge for up to 3 days. For reheating, just pop a piece in the microwave for a minute or two. You can also spread the pieces on a parchment-lined baking sheet and reheat in a 350°F oven for about 10 minutes if you want to re-crisp the top. The microwave is faster, but the oven gives you back some of that crunch.
The cooked breaded chicken (without sauce and cheese) freezes well for up to a month. Bake from frozen at 350°F for about 30 minutes to defrost and reheat, then proceed with the sauce and cheese finish as usual.
Serve This With
All you really need to serve this chicken parm is a simple pasta like spaghetti with pomodoro sauce. For a bigger spread, start with something like caponata as a starter. The sweet-sour eggplant is a nice contrast to the rich cheese and tomato. A simple grilled endive salad on the side adds a bitter, crunchy counterpoint that cuts through the heaviness. If you're looking for a more hearty pasta option, chickpea spaghetti holds up well with the sauce and adds some extra protein.
📖 Recipe

Equipment


Units
Ingredients
Chicken Cutlet
- 550 grams boneless skinless chicken thighs (breasts work too)
- 1 cup panko (Japanese breadcrumbs)
- 4 grams fresh rosemary (~2 sprigs, stem removed and minced)
- 3 grams fresh thyme (~3 sprigs, stems removed and minced)
- 40 grams Parmigiano-Reggiano (grated, Parmesan Cheese will work as well)
- Salt (for seasoning chicken)
- Pepper (for seasoning chicken)
- ¼ cup all-purpose flour
- 1 large egg
- 2 tablespoons extra virgin olive oil
Chicken Parmesan
- 4 cups basic tomato sauce
- 80 grams Mozzarella cheese (grated)
- 320 grams spaghetti
- flat leaf parsley (minced for garnish)
Instructions
- Put the oven rack in the middle position and preheat to 350 degrees F (175 C). Place a cooling rack on top of a baking sheet.
- In a large bowl, combine the 1 cup panko, 4 grams fresh rosemary, 3 grams fresh thyme and 40 grams Parmigiano-Reggiano.

- In a separate bowl, beat the 1 large egg until the yolk and white are well incorporated.
- Generously Salt and Pepper the 550 grams boneless skinless chicken thighs on both sides, then dust with ¼ cup all-purpose flour to coat evenly.
- Dip the coated chicken in the egg, making sure to cover the whole surface of the chicken with egg, then transfer the chicken to the bowl with the breadcrumb mixture.
- Coat both sides with a thick layer panko, pressing down on the chicken a bit to ensure an even coat.
- Place the chicken on the wire rack, then drizzle 2 tablespoons extra virgin olive oil evenly over the chicken.
- Put the baking sheet in the oven. Bake chicken for 20-25 minutes or until an instant-read thermometer reads 160 degrees F (71 C).
- While the chicken is baking in the oven, make, or reheat the 4 cups basic tomato sauce.
- Bring a large pot of well-salted water to a boil.
- After removing the chicken from the oven, increase the temperature to 500 degrees F (260 C).
- Pour the sauce into a casserole dish, then top with the baked chicken.
- Sprinkle with the 80 grams Mozzarella cheese, and additional Parmesan if you'd like.
- Bake the Chicken Parmesan until the sauce is bubbly and the cheese has formed a golden brown crust on top.
- Boil the 320 grams spaghetti according to the package directions, drain, then toss with olive oil.
- Serve the Chicken Parmesan over a bed of spaghetti with a sprinkle of flat leaf parsley to garnish.


Nutrition Facts
FAQ
Yes, and I'd argue thighs are actually better for chicken parm than breasts. They stay juicier through the double bake and have more natural flavor. The slightly smaller size of thighs compared to a pounded breast also means a better ratio of crust to meat in every bite.
No. Chicken thighs are naturally thinner and more even than breasts, so they don't need pounding. If a few of your thighs are noticeably thicker than the rest, you can pound them out a bit with the back of a chef's knife, but there's no need to get a mallet involved.
The total oven time is about 30 minutes across two stages. The first bake at 350°F takes 20 to 25 minutes to crisp the crust and cook the chicken through. The second bake at 500°F with the sauce and cheese takes another 5 to 8 minutes until everything is bubbly and golden.
Honestly, I prefer it. Baking on a wire rack gives you a crispy, evenly golden crust without the mess and splatter of frying. The panko and parmesan coating crisps up beautifully in the oven, and since you finish it in a casserole with sauce, any slight difference in crunch disappears once the cheese melts over everything.
Parmigiano-Reggiano goes into the crust for savory depth, and low-moisture mozzarella goes on top for the stretchy, bubbly melt. Avoid fresh mozzarella for this recipe since it releases too much water and can make the crust soggy. Pre-shredded mozzarella from a bag works but won't melt as smoothly as hand-grated.
Sam says
Can I make these with bone in/skin on thighs? I have a package of thighs that need to be used by tomorrow and I am tired of the usual crispy chicken thighs.
Marc Matsumoto says
Hi Sam, it's going to take longer to cook them through, but they should work. Alternatively, you could follow the directions here: https://norecipes.com/debone-chicken-thighs-legs/ to debone them.
Chris says
Love it
For company or a family meal
For me, I use cauliflower rice instead of Pasta
Marc Matsumoto says
Great call Chris!
Jackie says
Delicious, perfect. The breading was crisp, the tomato sauce was super flavorful, didn't need to adjust seasoning, spaghetti was simply delicious with flavoring from just the salted water and olive oil.
Marc Matsumoto says
Happy to hear you enjoyed it Jackie! Thanks for taking the time to leave a comment!
Eleanor Crisostomo says
I bought chicken thighs with bones and wanted to try this recipe. I did learn to debone thighs and this recipe is incredibly delicious! Mahalo for a wonderful meal that rivals my favorite Italian restaurants version. I did however, turn the oven on broil for a few minutes to brown the topping. I’m so happy that I will prepare this for my next dinner party.
Marc Matsumoto says
Hi Eleanor, I'm so happy to hear you enjoyed this! Thank you for taking the time to let me know!
Kathy Stroup says
Hey, Marc. Have you ever considered using mayonnaise to coat the chicken? It's an old trick cooks use here in the States to keep chicken moist, and it can be used to get breadcrumbs to stick. The finished dish doesn't taste anything like mayonnaise, either. (I know you don't care for it.) Mayonnaise is really just eggs and oil. It might even work to add mayo to the egg and then dip the chicken in it.
Your Chicken Parm looks so bomb!🐓🧀💥
Marc Matsumoto says
This is a fascinating idea. It's pretty common in Japan to use mayo to cook with and I think it certainly could work as a shortcut because it's also going to provide the oil needed to crisp the breadcrumbs.
imsen says
Very tasty! This is the first well plated recipe that I have tried and I’m glad I did. Will be trying more recipes in the near future.
Excellent taste, loved the ease of making this recipe and family loved it! Definitely a keeper!
Kiran says
Hi Marc, made this about a month ago and the family loved it! I cooked the chicken and sauce tonight, ready to assemble tomorrow. How would you recommend I do so? I was thinking of reheating the chicken and the sauce together first and then turning it up to 500 with the cheese. Is this the best approach or should I heat up the chicken alone first? What temperature would be best to avoid drying out the chicken? Thanks for your help and for the amazing recipe!!
Marc Matsumoto says
Hi Kiran, did you use thigh meat or breast meat? If you used thigh meat, I think you can heat the sauce, and then assemble it and heat the chicken while you're browning the cheese. If it's breast meat, this is still probably the best way to do it, but there's a high likelihood it's going to be a little dried out.
Kiran says
Thank you, Marc! It turned out perfectly! Just as good as the first time we made it. I used thighs, btw. I rarely use chicken breast anymore.
Marc Matsumoto says
I'm glad to hear it!
Marc Matsumoto says
Hi Sandra, glad to hear it works GF and that you enjoyed it. Thanks for sharing!
Sandra Jensen says
Made this gluten-free and it was amazing
Marc Matsumoto says
Hi Brandi, I'm not sure where you're located but they may be called something else where you live. They're basically whole canned tomatoes with nothing added except salt. You can used chopped tomatoes but they're not ideal because they're typically picked before the tomatoes are ripe so that they retain their shape. Which makes them more sour and less sweet.
Brandi says
I can't find whole stewed tomatoes, can I use the sliced ones? Also the only stewed ones I can find have peppers and onions in them. Are those the ones I use?
Gwenhwyfar Finer says
This is a great recipe. I really liked your use of thighs over breasts. Panko is also I great change. The one deviation I did from this recipe: after I cooked the thighs (this took 40 minutes at 350) and removed them from the oven, I left them on the rack, heated up the oven to 500, added the mozzarella/parm. to the thighs and put them back in, no sauce. Once the cheese got bubbly and browned, removed them and topped the spaghetti/marinara with them. It worked well, didn't dry out the thighs at all. I really look forward to trying more of your recipes. Thank you so much!
Elaine Foultz says
My family and I absolutely loved this entree. The recipe was very easy to follow, I recommend this recipe to anyone who loves italian food.
Susan Valdez says
Omg. I've never had this before and decided to try it, and it was sooo good. My picky kids even loved it. Thanks for sharing.
K Su says
Made this over the weekend. Thanks so much for sharing, best chicken parm ever! This recipe is a keeper, and I appreciate the detailed pics showing how it's done.
Raechel says
I used this recipe as my first attempt at making Chicken Parmesan and WOW, did it NOT disappoint!! I made it for some friends along with my family and everyone loved it, including the pickiest eater of us all (my 6yr old). This was so tasty...dare I say the best Chicken Parm I've ever had. Marc, you KILLED IT with this recipe!!
Marc Matsumoto says
Hi Michelle, the canned ones are fine and often better than fresh ones most of the year. It is best to get whole ones though as the chopped ones tend to be picked greener so they retain their shape.
Michelle Park says
Hi Marc,
Thanks for this fantastic recipe that I'm going to try. Can you clarify if it's okay to buy stewed tomatoes in a can, or should I really make my own stewed tomatoes?
thisismelissa says
Going to make this for a nice dinner for my boyfriend tonight, thank you for the recipe, I will report back with the results! Best to you and yours
Marc Matsumoto says
It depends on how big everyone's appetite is, but this should feed about 4 people.
Ethan Matthews says
Hi Marc, what is the serving size for this recipe?
Kelly Ducharme says
Made this the other night, I didnt have fresh herbs (used dried), but this had to be THE BEST Chicken Parmesan I've ever had ! ! !
Rachel Page says
Oh Yummm! Looks so-so good.Love me some chicken!
Leigh Chazen says
What an excellent recipe...I so agree with you about the elements that usually are disappointing but your take on it is so much better. Thank you!!
Kate Carrera says
Thanks for posting a chicken parmesan recipe that results in crispy, non-mushy chicken. I made several changes including subbing your sauce recipe for my own homemade bolegnese and browning the crumb-coated chicken in a pan before transferring it to the oven, but I stuck to the main idea and used your recipe as a guideline and was quite pleased with the results! Thanks again 🙂
TateH. says
Great recipe!! I just made this came out AMAZING!
Marc Matsumoto says
Hi !SG, if you look at the bottom of the ingredients list there's a drop down to convert the measurements to Imperial (ounces, pounds, etc).
!SG says
how about U.S. measurements grams very confusing
Marc Matsumoto says
Hi Cindy, it's actually the entire leg (including the drumstick meat). They don't sell just the thigh by itself here in Japan, but aside from being smaller, the thigh is basically the same cut of meat.
Cindy Post says
In your pictures above, are you using chicken thighs? They seem really big for chicken thighs?
MrSuaveh says
Great recipe and fantastic idea to bake the chicken in panko!
Baking the chicken is genius, it is quick to prepare, crispy, oil free and tender. I used to pound chicken breasts thin and pan fry them in oil but *no more*.
I really like this recipe a lot and only made a few minor changes:
- I do not use any dried herbs in my sauce because I think it makes the sauce bitter. A bundle of fresh herbs, that I discard after cooking, is good though.
- I will add one to three teaspoons of sugar to the sauce to balance out the acidity and salt.
- I added some kalamata olives and roasted garlic cloves to the sauce and chicken right before baking. That was ok but not sure I would do it again.
Thanks for the recipe it is fantastic!
BoniLady says
Just had this for Easter Dinner...I used our family's homemade sauce recipe, otherwise followed exactly for the chicken! It was amazing!! The chicken didn't get dried out like it normally does, and it stayed crispy!! My new go-to chicken parm recipe 🙂 thank you so much for sharing!!!
Whyugotta Bechittinme says
I'm going to make this tonight but will be subbing the egg w/mayo as I hate the whole flour, egg, crumb dipping ordeal. I think the idea of using a rack is brilliant, as is placing the chicken on top of the sauce. I had debated it myself, but when I saw it written out I realized how much sense it made. DOH! TY for this recipe!
Linda Owens says
This recipe is delicious ... I've made chicken parmesan and always enjoy it but this recipe is not that different but the method makes it extra good!
Marc Matsumoto says
Hi Yamilka, I'm glad to hear you enjoyed it! Great call on adding a bit of sugar to offset the acidity of the sauce.
Yamilka says
This is my second time following this recipe, it has been a hit both times! For the sauce I use a can of Hunts Garlic & Herbs, do the onions just like you and add 1-2 tablespoons of brown sugar. Or as much as needed to take away the acidity of the sauce. I also add water as needed (very little). My husband loves to order this dish at restaurants and I have never liked it until I followed your recipe. Thank you very much for sharing!
Giovanna Samuels says
So, So, So, good. Easy to follow and it came out great.
Wanda says
Just made this. It was really delicious. I like the crispness of the chicken from preparing with sauce on the bottom. Will definitely make again.
valleycat1 says
Try looking in the deli department instead of the basic dairy section; usually you can find small pieces of cheese or even order it by weight at the counter. Also, hard cheeses like parmesan will keep a long time if you follow the storage advice. Mozzarella is softer so will not keep as long; if your grocery has a salad bar you might even find some there that you could buy in whatever amount you want.
Marc Matsumoto says
Hi Minnie, while it would certainly change the flavor and texture of the dish (the cheese won't be stretchy), I think cheddar could taste quite good in this. Why don't you give it a try and let us know how it goes?
minnie says
hi- I really love this recipe but would it taste great if I use cheddar cheese instead cause i'm not a fan of cheese and don't eat a lot of it which result sin me chucking any excess cheese when I buy it just for one recipe. thank you.
Marc Matsumoto says
Hi Michelle, the problem is most likely the thickness of your chicken. This recipe is with chicken thighs which are usually quite thin (probably 1/2" at its thickest point). The other problem was most likely the temperature of your chicken. It could have seemed defrosted, but still be below 32 degrees in parts. Lastly, do you have a thermometer in the oven to verify the accuracy of your oven? I've seen ovens that have had thermometers that were up to 30 degrees off in temperature.Next time, you could try butterflying the breast or using a meat mallet to pound it out a little thinner.
Michelle says
Hi - I'm currently cooking this recipe, but am puzzled why it's taking my chicken so long to cook! I had it on 350F for about 23 minutes and checked the chicken, and still seemed very pink inside when I cut it in half and looked. I turned it up to 400 and put it in for another 8 minutes, checked it again, still seemed a bit pink and looked very wet and not well done (I prefer my chicken cooked very well). Also used a meat thermometer this time and it was around 150F so not quite there. Now it's in for the third time at 400 for another 7 minutes. The chicken I used was individually packaged chicken breasts (pretty thick) that had been frozen but were completely thawed out in the fridge. Do you know what could be causing them to take so long to cook? Seems very odd!
cindyb123 says
I made this a couple of days ago and it was excellent!! I did have to guess at some amounts because I was too lazy to look up grams versus cups, etc. And I did use Trader Joe's marinara for the sake of time and I did not have any fresh tomatoes. Even with the variation in sauce, this was an excellent recipe. The panko/flour and baking the chicken is key to the wonderful taste, I'm convinced!
Carolyn says
Can't wait to try this using homemade breadcrumbs that I have on hand. Thanks for sharing!
Marc Matsumoto says
Glad to hear you enjoyed it, thanks for sharing your modifications!
Jam says
I used breadcrumbs- as that was in the house. I made sure the chicken was patted dry before adding any ingredients which helped with the crunch factor.
After a good 25 min of slow cooking put it up to 325 fro 1/2 hr.
The cheese was modified by adding a bit of Romano and Pecorino to the topping.
Cooked again at 325
Sauce only covered the bottom of a Pyrex Dish and was just enough to marry flavors
Would make this again, really great recipe. Thanks for sharing.
kmd says
Rice is far worse for diabetics than wheat. It spikes blood sugar levels like crazy.
Anirbas says
Simply delicious! I didn't have any eggs, so I used Kroger brand Zesty Italian dressing to coat the chicken.
Marc Matsumoto says
Hi Jennifer, I'm sorry to hear it didn't turn out well for you. To be honest I've never made chicken parm before with regular breadcrumbs so I'm not sure if that could be part of the problem, but I do know from other recipes such as schnitzel that panko tends to crisp much better than regular breadcrumbs (which is why I prefer it it).
As for the cleanup, I'm not sure how you fry your chicken, but when I deep fry I use the pot I'm frying it, plus a wire rack and tray to drain the chicken after it's done frying, so for me, it saves a pot plus the hassle of disposing of frying oil.
jennifer9000 says
Would breadcrumbs instead of panko cause the chicken to stay soggy? I normally cook this dish on the stove top and it's fabulous, (with breadcrumbs) but I wanted to just try a different recipe for a change. My chicken stayed a soggy mess, much worse than normal.. I've never really had any issue with sogginess before in my chicken parm.The bread just tore apart and mucked up into the sauce. I let it cook 35 minutes, at 400 degrees during the last 5 ( total of 10 minutes longer than the recipe calls for,) but it never crisped. ?
Didn't feel like this saved cleanup at all... instead of cleaning a frying pan, I had to clean a baking rack and a baking pan. So I had an extra dish?
Wanted to like the recipe. Perhaps need to try it again with Panko instead.
Marc Matsumoto says
You'd need a very large oven, but you could in theory scale this up and it should work better than a deep fried one since you can oven fry a lot more chicken at one time than you can in a fryer.
teri says
How can I make this for 25 people?
Marc Matsumoto says
Glad to hear you enjoyed it! Great call using leftover tomato sauce.
gail says
Fantastic. Followed your directions exactly except for the sauce (had some left -over homemade). Your point of not soggifying the nice crispy chicken by drenching in sauce is spot on. The cheese I put on top was also a left over bag of shredded Walmart Italian blend (,mozerella/asiago/provolone/parmigian). Came out delicious. Thanks.
Elizabeth says
Thank you for such a nice recipe; I made this for date night this weekend and we both thought it was so good. I loved how crispy the chicken was from cooking it separately; it also made leftovers so easy. I just put half the chicken in half the sauce in a dish on the first night, then we cooked it up the same way with the leftover chicken in a new dish with leftover sauce and it made it just as yummy and not soggy since it didn't sit overnight in the sauce. This is officially our go-to chicken parmesan (better than a restaurant's!)! Really, thanks so much for such a winning recipe!
jandbcinAZ says
I make a Chicken Parm a Variety of ways, as well as changing up the Pasta. We both like Alfredo so I do the serve the Chicken and Red Sauce but serve the linguine with a home-made Alfredo Sauce with lots of garlic. I still drizzle a small amount of Red Sauce on the Chix as well as lots of melted Parm... which I spread over the pasta alfredo as well. Everyone I have served it to loves this version,its one of my husbands favorite.
Marc Matsumoto says
Hi Jan, I'm glad to hear you enjoyed it! I have a category dedicated to the best recipes on this site, which you can find under the "recipes" menu at the top of the page, or just click this link https://norecipes.com/type/best/
Jan says
I also have made many different chicken parmesan recipes and veal parmesan but this one is now at the top of my list. Tonight was a practice run with my family for a dinner party next week and by far this is the best recipe ever. Using boneless chicken thighs was the key for a moist, tender result. Also the measurements were exact. Thank-you. Do you have any other "best" recipes you
could share?
~*GingerMamiOf4*~ says
I just made this recipe for my family last night. Now, I did make a couple substitutions, (i.e.: whole wheat flour instead of all-purpose flour, & crushed Ritz crackers instead of Panko crumbs) & I always add white pepper to ALL my recipes. And boy was I surprised at my family's reaction...THEY LOVED IT!! I cook for myself, my husband, my 2 y/o, 6 y/o, & pregnant 17 y/o. So making a dinner that everyone loves or even likes can be very difficult, LOL! This is the 1st time I've ever made Chicken Parmesan & we will definitely be having this at least once a month from now on! And I can't wait to make this for my other family members as well! I give this recipe 5-stars & would absolutely recommend it to anyone looking for a delicious Chicken Parmesan that's relatively easy-to-make!
~*THANX*~
Marc Matsumoto says
Hi Norma, do you mean to get rid of the breadcrumbs entirely and only use rice flour or just to substitute the initial coating of flour to rice flour? If it's the later, it should work fine, but bread crumbs contain wheat flour so if your friend is gluten-free, you'll need to make sure you're using gluten-free breadcrumbs.
Norma Eich says
I am cooking for a diabetic friend. Can I coat the chicken with rice flour rather than wheat flour?
Marc Matsumoto says
Hi John, have a look at the FAQ https://norecipes.com/about/faqs/
John says
This sounds just like what I'm looking for. I'm cooking it tonight. Baking on a rack seems ingenious for keeping the chicken from getting soggy. I'm not getting the "no recipe" part, though. The ingredients and steps to take are carefully spelled out, with pictures, no less! Isn't that a recipe?
Marc Matsumoto says
Hi Laura, it's used in step 4 to coat the chicken before you bread it.
—
Sent from Mailbox for iPhone
Laura says
Does the flour go into the breading??
A_S00 says
I've always had the same intuition as you about the silliness of crisping up your chicken only to soggify it immediately afterward with excessive tomato sauce, so when I saw that you'd solved that problem, I was immediately interested.
I used this recipe (with a fair amount of modification) as a base for three different parmigianas (chicken, portobello mushroom, and fennel root). The fennel had some trouble sticking together as a coherent patty (I cut it horizontally into about 1/3" slices, and the layers of the root wanted to peel apart), so I sauteed it with some egg and flour first to keep it together, then gave it the same treatment as the other two.
As promised, each dish remained crispy and delicious on top, while there was plenty of sauce below to keep it interesting and top the pasta. I used panko, and was very satisfied with both how it coated the chicken and how it crunched when served. I can't imagine making a parmagiana using the more typical sauce layering technique after trying this; it's so much better this way.
I did the final baking at only 450f (500 seemed hot), and still had some of the bits of cheese that were sticking up start to burn before a pretty golden crust like that pictured had finished forming. I wonder if the last baking stage might be better done at 400f or so instead. It's also possible that my oven just doesn't heat very evenly; I'm in a new apartment and haven't cooked with it much yet.
All in all, a great recipe. Glad it showed up on teh googlez. Thanks!
Kristen says
Great recipe! Delish!
Savannah says
This was perfect, my first time making chicken parm for my bf and roommate. Turned out fabulous. I add a think tomato sauce as well I the sauce (we love sauce) lol and fresh parsley as well. Also used a blend of cheeses for the cheese topping, parm, provolone, mozzarella and Romano. I live that everything's baked and not greasy!! Thanks so much for posting this!
Kat says
Made this for my boyfriends birthday and it was simply AMAZING!!! followed the exact recipe and both my boyfriend and I were very satisfied. I will use this recipe from now on.
Marc Matsumoto says
Glad to hear you enjoyed it (and that you're a fan of winging it in the kitchen)!
angelikrebel says
This was amazing. I used Italian breadcrumbs instead of panko (what I had on hand) and tomato sauce instead of paste and it was outstanding. I think I will probably cook my chicken on a cooling rack from now on. I love the way you don't use a recipe that's the way I cook.
Trix says
Delish and got props from three teenage boys!
Michelle @ Taste As You Go says
Your reasoning behind putting the sauce on the bottom to maintain the crispness of the chicken makes perfect sense, Marc. I'm going to make my Chicken Parm like this from now on!
Marc Matsumoto says
Your dish sounds similar in it's components, but I'm guessing it's a different dish. All the versions of chicken parm I've ever seen involve a whole cutlet that's been breaded and fried.
Lizzie Mabbott says
I would be totally on board with this as it looks delicious, but chicken and pasta has always seemed weird to me (also chicken on pizza). Perhaps it's the double-beigeness of it all? Definitely doing that chicken on its own though!
kiki says
Just curious - this is how chicken parm has to be - the chicken has to be breaded? I am asking, because we have a family ricpe since generations for a maccaroni dish: fried chicken cubes in a hearty thick tomatoe sauce (tomatoes, t.paste, garlic, oregano, pancetta diced) inserted in nests of pasta, afterwards everything sprinkled with parmesan cheese and bread crumbs and olive oil and baked in the oven.
Marc Matsumoto says
Thanks! No Alfredo recipe, but you can use the sauce from my quick mac and cheese recipe with fettuccine https://norecipes.com/blog/macaroni-cheese-recipe/
saturnine says
Never mind--I mis-read it! Sorry about tha
saturnine says
Any reason why there's not a time estimate on the oven time for the chicken?
Terri's Table says
I really like how you prepared this. Makes more sense and it looks delicious.
spclancygc says
Sounds incredible......a nice variation would be a side of spinach fettucinni alfredo instead . Have you got a recipie for alfredo? Steve.