
Despite their elegance, Pavlovas are relatively simple desserts, making them the perfect party confectionary (try saying that three times fast). If you store them in a sealed container in a single layer, they'll even keep for a day or two, which means you can make the meringues ahead of time and do the final assembly before serving them to your guests.
For a baking newbie, meringues can be intimidating. I've certainly had my share of epic meringue failures in my time. Here are a few tips to make sure your pavlovas turn out perfectly every time:
- Use old egg whites - I know, this is counterintuitive. To understand this, let's talk a little bit about the science behind beating egg whites. When you whisk an egg white, the proteins unfold as they are hit with the whisk and bubbles of air. As you continue to beat them, the proteins start to form bonds and surround the air bubbles creating a foam. However, as the foam reaches its maximum volume, the proteins start forming tight sulfur bonds, which force out the air and water trapped in between. This is what causes a grainy meringue that appears to be weeping water. In classic French technique you always beat egg whites in a copper bowl, because the copper bonds with sulfur, preventing the proteins from forming sulfur bonds. When egg whites are fresh, the proteins start off tightly folded, which is why they're more viscous. This makes it much more difficult to beat air into them, resulting in a foam with less volume. However, fresh eggs also contain more carbon dioxide, which makes the whites cloudy and more pH neutral. This is significant, because a fresh egg is less likely to form sulfur bonds that lead to an unstable foam. Old eggs, on the other hand, have more relaxed proteins, making them runnier and easier to beat into a foam with more volume. The trouble is that as eggs age, they release their carbon dioxide and become more alkaline, which results in a less stable foam. The trick here is to lower the pH of the egg white by adding an acid, such as vinegar or cream of tartar, as your meringue reaches maximum volume. Put simply, you want egg whites that are old, clear, and runny. If you crack an egg open and it's cloudy and viscous, don't worry, just throw the whites in the fridge for about a week and you'll have some perfectly aged egg whites. Personally, I tend to use the yolks more than the whites, so I always just keep a container of whites in the fridge that I add to until I have enough to make these pavlovas:-) To read more about the science of meringues (or really just about anything food related), check out Harold McGee's book On Food and Cooking: The Science and Lore of the Kitchen. I don't keep a lot of recipe books around, but McGee's recipe-less cookbook is one of the few books I can't live without.
- Meringues hate fat - This includes, egg yolk and oil. Even a small amount of residual grease on a plastic bowl will prevent the egg whites from forming a stable foam. Use a glass bowl and make sure that both the bowl and whisk are completely fat free before adding your eggs. You also need to be very careful breaking the eggs as older eggs tend to have more delicate membranes holding the yolk together.
- Fully dissolve your sugar - Sugar that isn't completely dissolved in the egg white will result in sticky beads of syrup forming. Using superfine sugar, along with a little starch, helps fix this problem. The superfine sugar dissolves more readily and the starch helps the meringue retain moisture, which not only results in a more stable foam, it also prevents beading.

As fun as they are to use as a kid, the egg beater my family had when I was growing up was a piece of junk. It was hard to clean, jammed up all the time, and took forever to whip anything. When I left the house and discovered the Kitchenaid, I was forever sold on the wonders of an electric mixer. But after moving to an apartment with a kitchen too small to keep a Kitchenaid, I was pretty excited when I finally got an OXO Good Grips Egg Beater.
It's not going to knead bread dough for you, but for light duty whipping and emulsifying, the OXO beater is brilliant! It's smooth and never jams, comes apart so it's easy to clean, and best of all, the gearing (like on a mountain bike) makes it whip cream and eggs impressively fast. Since I don't have a mixer, it's a lifesaver, but even if I had one, I'd probably just turn to the OXO for small batches of meringue or cream because it's a lot easier to setup and clean, and takes about the same amount of time.

I like adding a fair amount of vanilla to my meringues, but it will turn the meringues a light tan color. If you're really determined to have a white pavlova, leave the vanilla out.
If you're game to try another iteration of meringue, this Eton Mess recipe is just about my favorite dessert of all time. But who needs to pick favorites?
📖 Recipe

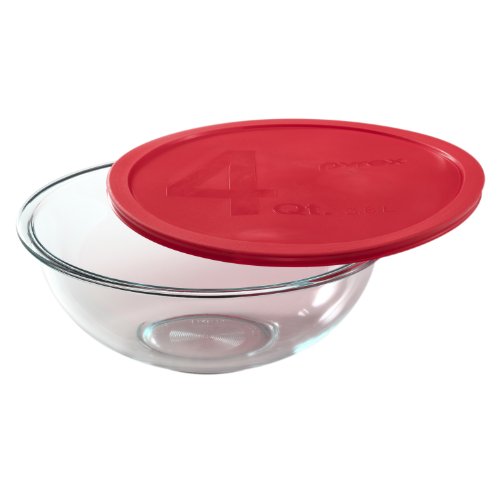
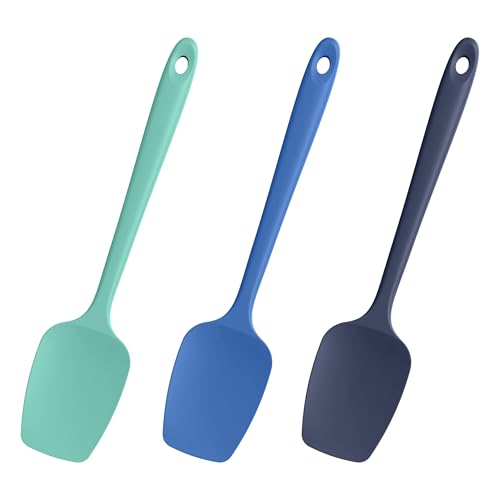
Equipment


Units
Ingredients
- 105 grams egg whites (aged)
- 120 grams superfine sugar
- 2 teaspoons corn starch
- 1 teaspoon vanilla extract
- ½ teaspoon white vinegar
Instructions
- Preheat the oven to 250 degrees F (120 C) on convection mode. If your oven can't do convection it's fine, but you'll want to increase the heat by about 20 degrees F and you may need to bake the pavlovas longer. Line a baking sheet with parchment paper.
- Add the 105 grams egg whites to a very clean glass bowl (or in the bowl of your electric mixer) and beat until it's foamy and soft peaks start to form.

- Whisk together the 120 grams superfine sugar and 2 teaspoons corn starch in a small bowl. Add the sugar mixture in 4 additions to the egg whites, beating the mixture in between each addition. If you have an electric mixer, you can just let the mixer run while you slowly pour the sugar in.
- Once the meringue is glossy and holds firm peaks (you should be able to hold the bowl upside-down without the egg whites falling), add the 1 teaspoon vanilla extract and ½ teaspoon white vinegar and beat until well incorporated.
- If you're making a big pavlova, just scrape all the meringue into the center of the parchment paper lined baking sheet. If you're making mini pavlovas, divide the meringue into 5 small mounds, each about the same height. Give each pavlova a twirl with a spatula from the outside towards the center to give them a nice shape and put the pan in the oven.
- The pavlovas are done when the outside is crisp (about 45-60 minutes in a convection oven). Tapping on them should result in a hollow sound and the meringue shell should be at least 5mm thick, while the inside is still soft. Allow them to cool completely on a wire rack.
- To construct the pavlova, use a spoon to knock down the middle of the meringue making a well in each pavlova. Fill the shell with cream, then top with seasonal fruit of your choice. I used cherries, peaches, kiwifruit and passionfruit for mine, but strawberries, raspberries, and blueberries are also delicious.


Audrey says
Hello, what temperature in F and time should I cook a large pavlova for about 20 people?
Marc Matsumoto says
Hi Audrey, I don't recommend doing one large pavlova as it will take a ridiculously long time to cook I can't tell you the the time and temperature because I've never done one for 20 but if I had to guess I'd say you'd want to lower the temperature at least 50 degrees and you'd be looking at a baking time of 3+ hours with another 3 hours or so with the oven door slightly propped open. But again I've never done this and it's a total guess.
Jacquelyn Texeira says
My pavlovas are tough and gummy. What did I do wrong? I have a convection oven.
Marc Matsumoto says
Hi Jacquelyn, the most likely culprit is that they weren't in the oven long enough. Unfortunately it's difficult to give an exact amount of time they need to be in the oven for as most ovens are off by +/- 20 degrees. Also things like humidity can effect baking times as well. Pavlovas should have a crisp shell on the outside and they should be soft and marshmallowy in the center. So if they're not feeling crisp on the outside yet, leave them in the oven longer. You can also try and leave the door cracked open a bit, which should air with the air circulation.
Jacquelyn Texeira says
Thank you.
Carrie Lynn Ingles Groneman says
THANKS Marc for the advice and I think I'll go with a soft serve ice cream bar for the reception and make this fabulous dessert for my family! GREAT recipe tutorial.
Marc Matsumoto says
Hi Carrie, congratulations on your daughters marriage. If you think you can pull these off, mini pavlovas would certainly make a stunning presentation. That said, it's a pretty big chance you'd be taking for a number of reasons. First, the egg whites need to be pretty old for this to work well. If you do decide to do this, you may want to separate the eggs a week+ in advance to help them along. The second issue is that if you bake them until they're still a little moist in the center (as a pavlova should be) they will not keep for more than a day since the remaining moisture in the center will seep back out and make the whole pavlova get sticky, so if you do decide to do this, I'd recommend baking them until they are completely dry (more like a meringue cookie). The last thing is all the variables that come into play with meringues like humidity, oven temp, etc. If after reading this you decide to give this a go, you probably want to do a few test runs and be very comfortable with the temperatures and times your oven requires as well as how many days they will keep before using them for your daughters reception. Good luck!
Carrie Lynn Ingles Groneman says
Hello Marc, I'm thinking of making these for my daughter's wedding reception. Would it be possible to make 600-700 mini ones ahead and could I pipe them into a small twisty cup style (sorry, I can't describe it very well) and would they store after baking? If so, how long would they store. I'm in Utah, USA. Do you have a fabulous recipe for a make-ahead filling? THANKS for any help you can give me.
Michellene Grauls says
Thankyou so much. I have been wondering how to get that beautiful tan crust. Now, every pav will have vanilla 🙂
Marc Matsumoto says
Hi AussieInIndy, thanks for the idea! I'll get my dad to bring some up to Japan the next time he comes.
AussieInIndy says
Great post. I make pavlova about every 2 weeks. I'm Australian however I have lived in England and am currently in America. Its been a dinner favourite for years. Marc if you can ever get Wattle seed, try blending a tablespoon or two into your mix. It makes a lovely alternate pavlova with a distinct extra Australian flavour. kudos to a restaurant in Adelaide from 1992 where i first came across this.
Inka says
Ronalie, can you share the recipee?
Mine always turns too brown and is sticky.!!!
Marc Matsumoto says
Hi Julian, you can actually make these at a much lower temperature (as low as your oven will go) it will just take much longer. The reason I suggest this is because for larger pavlovas, they take longer to dry and so using a higher temperature oven will likely result in browning. This also gets around the issue of hot spots in the oven so you won't need to rotate the trays. As for icing sugar, I haven't tried it, but it should work.
Julian says
Hi, will it be a problem to cook two large pavlovas at once on two layers? I have a pretty old oven, and normally i would switch the baking trays around but I know with pavlova I shouldn't open the door halfway through baking. Is icing sugar ok to use?
Thanks for all the tips!
Lorna says
I have noticed this problem when I Omega 3 eggs! (Chickens fed flax.) Try using ordinary eggs.
Marc Matsumoto says
Hi Tom, one possibility is that the problem is with the humidity there. I've never tried making pavlovas in a humid place, but I know from making macaron (which also involves a meringue) that humidity does bad things to meringues. Try lowering the heat and letting them sit in the oven longer with something fireproof wedged in the oven door to keep it opened just a crack. The other possibility is that your oven isn't getting hot enough (most ovens are off by at least 10%, especially as they get older), in which case a longer time should also help. Best of luck!
thailandtom says
🙂 opps I meant to add...basically (apart from a few crispy bits around the edge as described) the entire pavlova is the marshmallow. It still tastes great...but would be far better if it has a crispy outer shell too
thailandtom says
Hi Marc...an interesting read...I am Australian and was always able to knock up a brilliant Pavlova - however I have now after living in Thailand for the past few years - I have never been able to get a good result (to date anyway)...this is even when I have followed your advice (and the advice of many others). The problem I find is that the prior to baking, the pavlova mix is perfect (old egg whites + sugar fully dissolved). The mix rises to about 50% to double its initial height in the oven too...BUT...it always collapses back to its original height + more importantly, the tops and sides are never crisp (just very sticky/gooey to the touch). Yesterday I lined a baking tin in paper (and the sides touching the paper became a little crisper...but nothing as in your pics - or from my experience at home in Australia). Any advice? maybe if I baked it thinner and created a pavlova roulade maybe a better idea?
Marc Matsumoto says
Hi Jadyn, they will lose their crispness and get soggy if you they're exposed to moisture so it's important to store them in an airtight container once completely cooled. ]
jadyn says
how do i store parlovas ??
Melissa says
Great, thank you. 🙂
Marc Matsumoto says
Tapioca starch?
Melissa says
Both potato and corn starch are off the table due to allergies. Are there any gluten-free substitute starches for this recipe? Thanks!
Cindy says
Hi Marc, I will keep in mind to bake it longer next time! I baked it for 1 hr and 20 minutes each. It was a 2 layer chocolate pav with blueberies and strawberries, I found the middle too mushy for me this time, but everyone loved it! But you are correct, the cream and fruit hid the cracks and sunken sight! No I did not knock down the middle. I thought it was supposed to be with some height, it looks better with height instead of flat...Never the less, it was all eaten up! 🙂
Maybe because not many people make this type of dessert, so it's kind of new to them.
Thank you for the tips!
Marc Matsumoto says
Hi Cindy, there are a couple possibilities. The most likely is that you need to bake it a little longer (this happens in humid oven). If the outer shell is too thin, the weight of the soft meringue on the inside pulling down on the dome as it cools could cause it to collapse. If you have a convection mode on your oven, try using it. Otherwise you can try leaving the oven cracked open a hair while baking using a wooden spoon or something that won't burn/melt to hold the door ajar. This helps moisture escape from the oven. The other possibility could be with the eggs themselves. Did you notice the meringue getting kind of chunky before you put the pavs in the oven? If so, the egg proteins might have been wound too tight (either from over whipping or from the eggs being too fresh), squeezing out water and making an unstable meringue. How did the meringues taste? The reason I ask is because you knock down the center when you serve it anyway, so as long as the pavlovas tasted okay, you should be able to cover up the collapse with cream and fruit.
Cindy says
Hi Marc,
Thanks for the quick reply!
When it was in the oven it's nice and high, I left it in the oven with oven door open to cool with temperture off, but once it cools, it cracked and it sunk. It is crispy though. I did noticed, even the egg whites was not rising as much as I made the one a week ago. The one I made a week ago also sunk when cooled. I made two yesterday, both did the same thing, maybe it has something to do with the humidity yesterday, it rained most of the day here in Toronto, Ontario. I do have my air conditioning on all day.
It would be great if you can tell me what I'm doing wrong.
Thanks!
Marc Matsumoto says
Hi Cindy, I'm sorry to hear you're having problems. When you say "flop" can you please describe the nature of the problem? Is it not crisping? Is it browning too quickly? Is the meringue breaking? I want to help but need to know more about what the problem is to give you a solution.
Cindy says
Why does my pav flop? This is my 4th time making it... :'(
Marc Matsumoto says
Glad I could help:-) You could also make some Chocolate Pudding ( https://norecipes.com/blog/chocolate-pudding-recipe/) and save the egg whites in a tupperware for about a week, which should do the trick.
Marilia says
Thank you thank you thank you! I've been making Pavs for a long time. I recently started using fresh eggs from my chickens to my detriment! Wasn't sure what I was doing wrong. Will stick to supermarket eggs in future! (Guarantee they will always be old haha)
ronaliefrew says
Being an Aussie, Pavlova is a desert often served here. There are good "pavs" and very bad ones. Your explanation of how the texture of a good Pavlova should be is perfect! Absolutely! I have made many versions, but the best is this recipe that I have been using for years. Your explanation of how the egg whites react is brilliant.
Ronalie
Marc Matsumoto says
In theory you could, but it's going to depend on how even the temperature in your oven stays. You'll probably want to swap the pans half way through to make sure one doesn't start browning. Also if you have an oven that has a convection mode, that should help.
Dawn says
can you cook two pan at once? On different racks.I want to make about 16 minis.
Marc Matsumoto says
Hi Chrisbun, when you say 1/3 marshmallow do you mean that the crispy shell is 2/3's and the marshmallow is only 1/3 or that there's 1/3 marshmallow at the bottom, and then a big pocket of air? If it's the later this is normal and unavoidable unless you cook the pavlova crisp all the way through as the air pockets in the meringue expand when heated and then contract when it cools. If you cook the meringue until crisp all the way through the structure is set so even through the air contracts, the shape does not change. If you mean that you want less crispy bits and more fluffy bits, it's just a matter of cooking the meringue for less time at a higher temperature. This will set the outside into a crisp shell and leave more of the middle soft.
chrisbun says
My mum has been making pavlovas for years, however, she only gets about 1/3 marshmallow, and would like to know what she may be doing wrong, as she would like to have a lot more marshmallow in her pavlovas. What sorts of things reduce the amount of meringue in a pavlova.
Marc Matsumoto says
Yep it should have a crisp outer shell with a soft marshmallowy center.
Marilia says
I have just one question mark. How should the final consistency of the insides of the pavolva be after you crack the tops? Mines where kinda like marshmallowish. Is that alright?
Marc Matsumoto says
Yep, in this case you can substitute it 1 for 1. If you're in the US potato starch is sold under the Bob's Redmill brand. Whole Foods carries it as well as many health food stores.
Akila says
I'm finding it hard to get potato starch. Will cornstarch do?
Peter G says
Pavs are so much fun to make! I love making them in the summer and topping them with all that gorgeous summer fruit. Nicely done Marc!
Carolyn Jung says
Look at all those beautiful colors atop your pavlova. Love these in summer when so many other desserts just seem too heavy to indulge in.
Carolyn Jung says
Look at all those beautiful colors atop your pavlova. Love these in summer when so many other desserts just seem too heavy to indulge in.
Marc Matsumoto says
It's fun isn't it? As for leaving the pavlova in the oven overnight, doesn't that make it crisp all the way through? I actually enjoy having a relatively thin crispy shell with a soft fluffy interior.
Marilia says
Whenever I make pavlovas, my fav part is turning the bowl upside down after the egg whites has formed stiff peaks... ! Usually I leave mine in the oven overnight (a Delia Smith trick) for it to dry out.
Marc Matsumoto says
Good luck on the macarons. They can be a pain, but they're worth the effort!
Marc Matsumoto says
Great idea about using brown sugar. I may have to try that next time. I've made them before with maple sugar and that imparts a marvelous flavor.
Faz says
Interesting to see someone else's recipe - I usually turn
the oven off and open it a crack and let it cook completely for 2-3 hours
before I take it out. However I make a very soft Pavlova with a very thin crust and is very fluffy. I have a friend who
makes a chewy one which involves baking on high heat (180) for about 10 mins
before turning it down.
Also if you use brown sugar it gives it a more caramel taste.
As you may have guessed I love Pavlova and I've played around with the different
ways of making it. (There has been some very sad fails too)
Marilia says
Pavlovas are a perfect vehicle for fresh summer berries and whipped
cream. Love it. Thanks for clarifying the aged egg whites. I'm slowly
building up the courage to make my first macarons and have read that
this is an important step. Well done, Marc!
Marc Matsumoto says
Glad to hear it was helpful! I was always the kid that asked grownups "why" about everything and understanding why things happen the way they do in the kitchen is key to cooking without recipes:-)
Marilia says
What a great post. Pavlova is one of my favourites - to eat and to make - this step by step is fantastic!
Thomas Abraham says
Love the tip and explanation about the egg whites! I cannot wait to try this. Looks delicious!
Marilia says
Love the tip and explanation about the egg whites! I cannot wait to try this. Looks delicious!
Marc Matsumoto says
I've loved Pavlova since I was a kid!
Marc Matsumoto says
Pavlova is one of my favorites too!
Oui, Chef says
Intoxicating indeed! Pavlovas are among my favorite desserts, and yours looks outstanding.
Elra says
Gorgeous! Definitely my favorite recipe.
Marilia says
This is lovely, Marc. Such a beautiful pavlova!
DenaTBray says
Delicious, appealing. Well doen.
Marilia says
your photogrpahs are amazing and the recipe looks tasty! I shared this on https://grubodex.com
Mello says
Gorgeous. My mouth is watering. Also, loving the additional prep photos, Marc!