

Spicy Tuna Roll (スパイシーツナロール)
One reported account traces the spicy tuna roll to Seattle's Maneki restaurant in the early 1980s, although its exact origin is difficult to pin down. It has since become one of the most popular styles of sushi around the world. Hand-chopping the tuna breaks down stringy connective tissue while letting you control the texture, and seasoning it with sriracha, soy sauce, sugar, and sesame oil creates a balanced mix of heat, salt, sweetness, and umami.
The filling works in three formats that shift the balance of rice, nori, and tuna. Hosomaki keeps everything compact, uramaki adds cucumber and sesame with the rice on the outside, and gunkan gives the spicy tuna center stage. Here's what makes each style work.
Jump to:
Why My Recipe Works
- Hand-chopping the tuna gives you control over the texture. Repeated passes with the knife cut through stringy connective tissue, but you can stop while the tuna still has some bite.
- Sriracha supplies the heat, while soy sauce adds salt and umami. Sugar balances the seasoning, and sesame oil rounds it out with a warm, nutty aroma.
- One filling works differently in all three formats. Hosomaki keeps the proportions compact, uramaki makes room for cucumber and sesame, and gunkan puts more tuna over a smaller base of rice.
- The step-by-step video shows how the amount of rice, filling, and pressure changes from one style to the next.
Hosomaki
Hosomaki (細巻き) literally means "thin roll," which is the most popular style of rolled sushi in Japan. The nori is rolled on the outside, with the rice and filling in the center. Common fillings include cucumber, pickled daikon, and negitoro, and it has a good balance of rice to nori to filling.
Uramaki

Uramaki (裏巻き) literally means "backward roll" in Japanese because the nori is on the inside and the rice is outside. This style of sushi was popularized outside of Japan to hide the nori as seaweed was considered unappetizing during the early spread of sushi worldwide. This style also allows for more filling to be added both inside and outside of the roll, opening new avenues for creativity.
Gunkan Maki
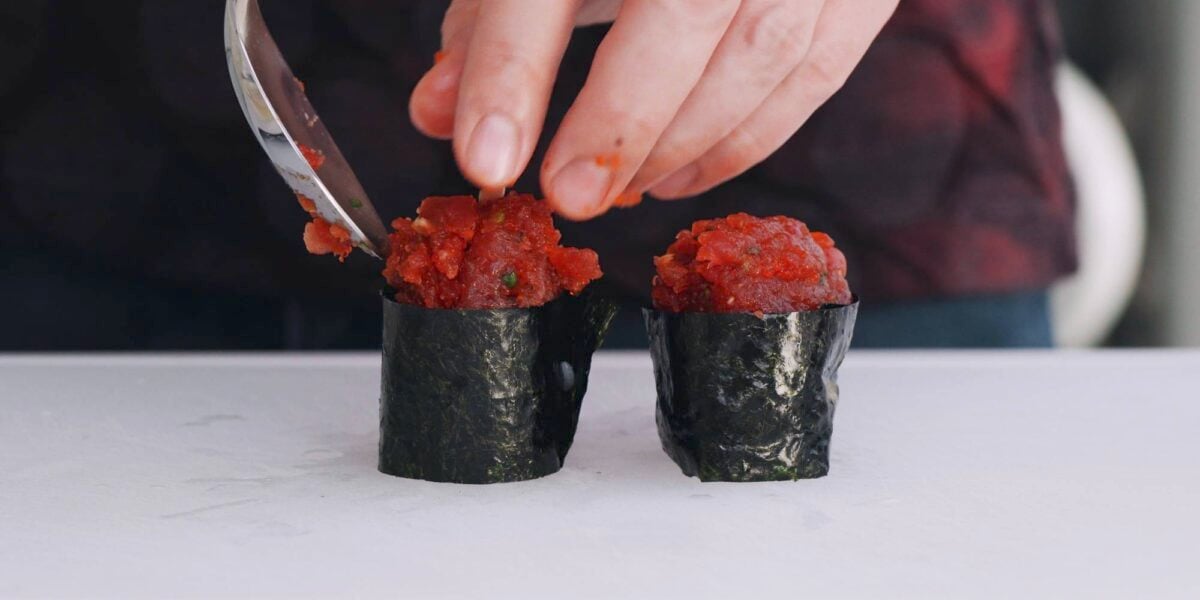
Gunkan Maki (軍艦巻き) literally means "warship roll" because it is said to resemble old navy ships. It's made by rolling a thin strip of nori around a small base of rice, which creates a big cup to add a lot of filling, such as Spicy Tuna. This creates a balance that's more heavily weighted towards the nori and filling.

Ingredients for Spicy Tuna Rolls
- Tuna - This recipe uses raw tuna, so buy it from a fishmonger or retailer you trust and ask whether it was handled for raw consumption. "Sushi-grade" and "sashimi-grade" are marketing terms in the US rather than an official FDA designation, and no label can eliminate the risk of eating raw fish. The FDA notes that freezing can kill parasites but does not eliminate every harmful germ, and recommends that pregnant people, young children, older adults, and people with weakened immune systems avoid raw seafood. I used Bigeye, but Yellowfin or Bluefin will work as well.
- Sriracha - I like using sriracha chili sauce as my source of heat for Spicy Tuna Rolls because, in addition to a chili kick, it includes a little garlic, and it's not too acidic. That being said, any Asian-style spicy sauce or chili paste that isn't too sour or sweet will work. Sambal oelek and doubanjiang are two other options.
- Soy sauce - Sriracha alone doesn't have enough salt to season the tuna, so I like to use a little soy sauce to add salt and a lot of umami to the Spicy Tuna.
- Sugar - Some brands of sriracha sauce are quite sweet and do not need any additional sugar, but if you're using brands like Huy Fong (Rooster brand), or you're using a different hot sauce, you may want to add a bit of sugar to balance out the salt and heat.
- Sesame Oil - I like adding a bit of sesame oil to my Spicy Tuna, which gives it a warm, nutty flavor, but this is optional.
- Scallions - Scallions (green onions) add a bit of fresh crispness to the Spicy Tuna while providing a pop of color. You can also use shallots or sweet onions if you like.
- Tobiko - This is totally optional, but I love adding a bit of tobiko, which adds the poppy texture of the flying fish roe. If roe isn't your thing, you can also add other textural ingredients like fried onions, nuts, or sesame seeds.
- Sushi Rice - I have a whole sushi rice tutorial you can check out on the proper way to select, wash, cook and season short-grain rice for sushi.
- Nori - I usually start with whole sheets of unseasoned nori and cut it to the right size, depending on the type of sushi I am making. When selecting nori, you want to look for sheets that are uniform in grain and thickness and almost black in color with just a hint of green. Green nori or nori that's semi-translucent is a sign of cheap nori. A reddish tint indicates the nori is old.
- Cucumber - For my Uramaki-style rolls, I like to add a little cucumber for color and texture. I used Japanese cucumbers, but any thin-skinned cucumber, like Lebanese, Persian, or English (a.k.a. hothouse) will work. If cucumbers aren't your thing, avocado and crispy tempura batter are some other good options.
- Black Sesame - I like to sprinkle some black sesame seeds on the outside of Uramaki rolls for a little extra texture and visual appeal. Other options include tobiko or fried onions.
Prep Notes
- Buy tuna from a trusted retailer and ask whether it was handled for raw consumption. Keep it cold, and keep the spicy tuna filling covered and refrigerated until you're ready to roll.
- Have the sushi rice, cut nori, tezu, cucumber, sesame, and tools ready before you mix the filling. Once the tuna is seasoned, you can move straight into shaping the sushi.
- Wrap the bamboo mat in plastic before making uramaki. The rice sits on the outside of this roll, and the plastic keeps it from sticking to the mat.
- Start with less rice and filling than you think you need. A thin, even layer seals more easily, and you can add a little more on the next roll once you get a feel for it.
How to Make Spicy Tuna Rolls
Spicy Tuna
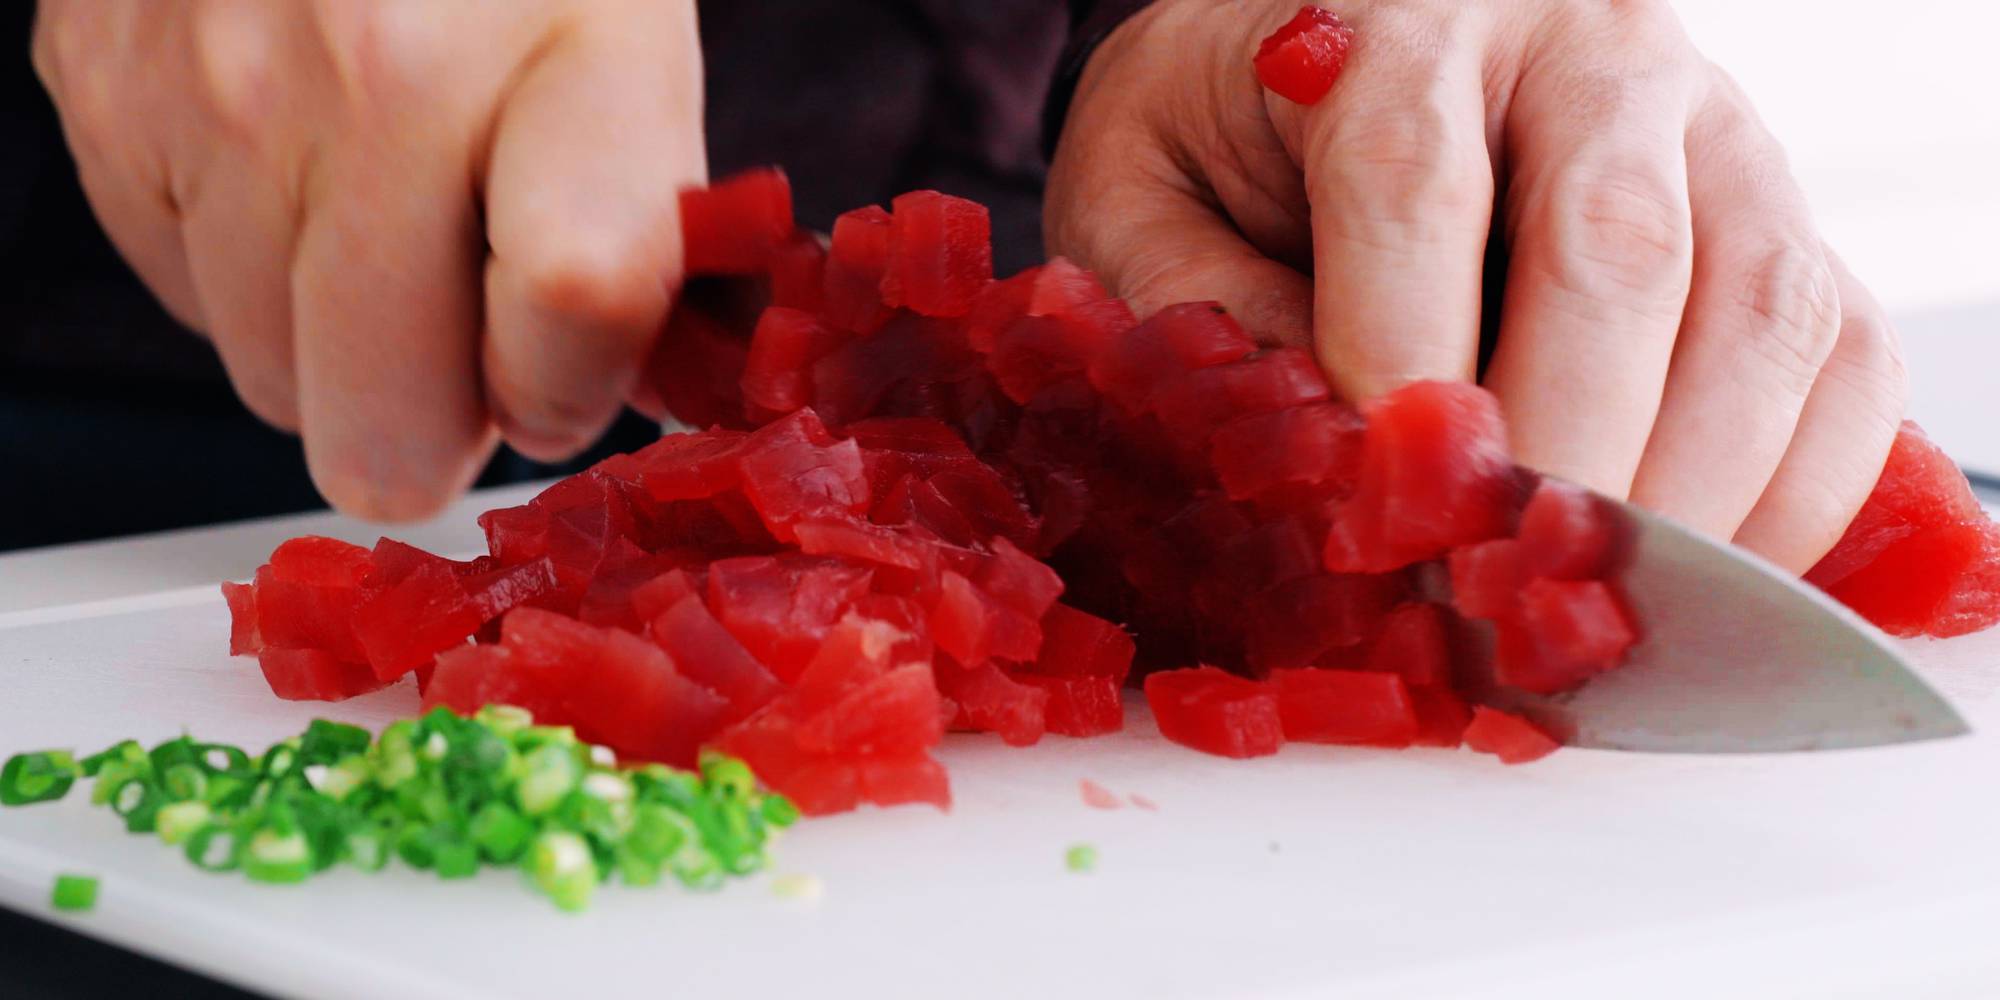
To make the Spicy Tuna, the first thing you want to do is chop up the scallions. I usually use the stems (white part) in the Spicy Tuna mixture and save the leaves (green part) to use as a garnish.
Then you need to mince up the tuna. The best way to do this is to cut the tuna into long thin strips and then turn the strips 90 degrees to chop it into cubes. You can then go back over the tuna repeatedly with the knife to mince it as finely as you like. I usually like to leave a little bit of the texture, so I don't mince it too finely, but this is up to you. I also mince in the scallion stems with the tuna to make sure they're nice and fine.
Now you can put the minced tuna mixture into a bowl and add the sriracha, soy sauce, sugar, sesame oil, and tobiko. Then it's just a matter of stirring this all together until the ingredients are evenly distributed. Be sure to keep the Spicy Tuna filling covered and refrigerated until you are ready to use it.
How to Cut Nori Sheets For Sushi

A full nori sheet is approximately 8 inches by 7 inches (20 cm by 18 cm). Most rolls require the sheets to be cut in half, so they are 4 inches wide. You can do this with a sharp knife or scissors.
For Gunkan, trim 1 inch off one end of each half sheet, then cut the remaining rectangle into three long strips. See the diagram above for more details.
How to Make Tezu
Tezu(手酢) literally means "hand vinegar" and is used to keep your hands wet while making sushi, so the rice doesn't stick to them. It's made by mixing a few tablespoons of rice vinegar or sushi vinegar into a small bowl of water. The vinegar prevents the taste of the rice from getting watered down.
How to Make Uramaki Sushi
Uramaki rolls have the rice on the outside, so it's important to use a sushi mat that's been wrapped in plastic to keep the rice from sticking to the mat.
Place a sheet of nori at the edge of the bamboo mat, then wet your hands with Tezu and grab a handful of rice. Use your fingers on both hands to place a row of rice along the nori's top edge from one side to the other.
Making sure to keep your hands wet at all times, use the tips of your fingers to spread the row of rice from the top edge of the nori all the way to the bottom edge. Think of this as picking and placing the rice rather than smearing it as you want to spread it without smashing the individual grains. You also want to make sure you get the rice all the way to the edges of the nori in a thin, even layer (you should almost be able to see the nori through the rice).
Sprinkle the black sesame seeds evenly over the surface of the rice, and then use the nori to flip the rice over so the nori is facing up.
Add a strip of cucumber across the center of the nori, and then spread some Spicy Tuna on top of the cucumber. Uramaki gives you a little more runway to add extra filling than Hosomaki, but it's still important not to overload it, or your roll won't seal shut. My recommendation is to start with less filling and slowly increase the amount because a smaller roll is easier to shape.
To roll the Spicy Tuna Uramaki, lift the bottom edge of the mat up and over the filling and make sure the rice makes contact with the nori on the other side. Then you want to lift the edge of the mat away from the rice and push the back of the mat to roll the roll onto its seam. Cover the roll with the mat, and then press on all sides to give the roll its final shape. You want to apply enough pressure to get the rice to adhere, but you don't want to overdo it, or the filling will squeeze out of the sides of the roll.
How to make Hosomaki Sushi
Hosomaki is made in a similar way to Uramaki, but there are a few key differences.
Since the nori will be on the outside, you need to make sure you place the nori at the bottom edge of the sushi mat with the shiny side facing down.
When you're placing the rice on the nori, use a little bit less rice than for Uramaki, and leave a ⅓-inch border of nori at the top. This allows you to seal the roll shut without having rice showing through the seam.
Once the row of rice is in place, spread it down to the bottom edge of the nori sheet, but be sure to leave the margin of nori at the top.
Spread the Spicy Tuna in a thin row just below the center of the rice. Because you have less surface area to work with in this roll, it's important to limit the amount of filling you add, or the roll will not seal shut.
To roll the Spicy Tuna Hosomaki, roll the bottom edge of the mat up and over the filling and make sure the nori's edge makes contact with the edge of the rice. Use the mat to roll the roll onto its seam, and then use your fingers to press the roll's top and sides into its final shape.
How to make Spicy Tuna Gunkan
Gunkan is made with a minimal amount of rice at the bottom of a ring of nori, so the first thing you want to do is wet your hands with Tezu and grab a small ball of rice (about 2 tablespoons). Then you can use your fingers to shape it into a rectangle about the size and thickness of two dominoes.
Wrap the strips of nori cut for Gunkan around the rice. Then wet the top of your finger and press down on the rice from above, which will round out the rice's shape and fill out the nori.
Use a spoon to scoop the spicy tuna filling into the Gunkan, and then garnish the top with some scallion greens or chives.
How to Cut Sushi Rolls
A long, sharp knife cuts the rolls without compressing or tearing them. Keep a wet paper towel nearby and use it to moisten the blade after each cut so the rice doesn't stick. This technique works for both Hosomaki and Uramaki.
First, cut the Spicy Tuna Roll in half.

Line up the two halves. Wet the knife after each cut and slice both halves into thirds.

Turn the pieces so their cut sides face up. The flat cut surface keeps the end pieces standing upright.

What to Watch For
- Warm rice - Let the sushi rice cool before rolling. Hot rice softens the nori, which makes a clean roll harder to shape.
- Too much rice - Spread a thin, even layer without smashing the grains. For uramaki, take the rice all the way to the edges. For hosomaki, leave the top margin of nori bare so the seam can seal.
- Too much filling - A generous line of tuna looks appealing until it squeezes out or keeps the seam from closing. Start small, especially with hosomaki.
- Uneven pressure - Press firmly enough for the rice to adhere, but stop before the filling escapes from the sides. This is where a sushi mat helps because it allows you to apply even pressure across the entire roll.
- A dry or dull knife - A long, sharp, damp blade cuts through the roll instead of dragging rice and filling through it. Wet the blade between cuts.

Serve This With
The usual partners for sushi are pickled sushi ginger and wasabi. To turn the rolls into a larger meal, I like the crisp, briny contrast of seaweed salad, the creamy texture of kani salad, or a bowl of salted edamame.
Other Sushi Recipes
Recipe
Spicy Tuna Rolls

Equipment
Ingredients
- 360 grams tuna
- 2 tablespoons sriracha
- 1 tablespoon soy sauce
- 1 teaspoon evaporated cane sugar
- 1 teaspoon toasted sesame oil
- 1 scallion
- 2 tablespoons tobiko (use sesame as an alternative)
- 1 batch prepared sushi rice
- 1 cucumber (seeded and cut into ¼-inch wide strips)
- Black sesame seeds
- 4 sheets nori
Instructions
Why it works- Chop the 1 scallion, reserving some of the greens for garnish.

- Slice the 360 grams tuna into thin strips and then turn the strips 90 degrees and chop it up. If you want your spicy tuna chunky, you can stop here, or you can continue to chop the tuna up with your knife until the pieces are smaller. I usually add the scallion stems in here and chop them up together with the tuna.
- Transfer the chopped tuna to a bowl, and add the 2 tablespoons sriracha, 1 tablespoon soy sauce, 1 teaspoon evaporated cane sugar, 1 teaspoon toasted sesame oil, and 2 tablespoons tobiko, and stir everything together until mixed. Cover and keep the mixture refrigerated until you're ready to use it.
- Make some Tezu by adding a few tablespoons of rice vinegar to a small bowl of water.


- For the Gunkan, you want to cut the 4 sheets nori according to the diagram in the headnotes above.
- Wet your hands with the tezu and grab about 2 tablespoons of the 1 batch prepared sushi rice. Gently press it into a rectangle with your fingers, but don't smash the individual grains of rice.
- Wrap each rectangle of rice with the strips of nori you cut for the gunkan.
- Press the center of the rice to make the rice fill out the nori wrapper.
- Spoon some spicy tuna into each cup of nori. Garnish with scallion greens.


- For Hosomaki, the full sheets of nori should be cut in half according to the diagram above.
- Place the nori at the bottom edge of a sushi mat with the shiny side down.
- Wet your hands in the Tezu and grab a small handful of rice. Place the rice in a line along the nori's top edge working from one side to the other. Be sure to leave a thin margin of nori at the top.
- Wet your hands again if needed and spread the rice to the bottom edge of the nori sheet using a picking and pressing motion. Don't smash or smear the rice.
- Spread a thin line of spicy tuna in the lower half of the rice from one side to the other.
- To roll the spicy tuna hosomaki, use the mat to flip the bottom edge up and over the filling and make sure this edge meets the rice's top edge.
- Pull the edge of the mat away from the nori and push the back of the mat forward, so the seam rolls to the bottom.
- Use your fingers to press 3 sides of the roll against the cutting board to give the roll its shape.
- See the headnotes or watch the video for instruction on cutting a roll.


- For Uramaki, the size of the nori and process is similar, but you need to use a sushi mat that is lined with plastic wrap, or the rice will stick to the mat.
- Place a sheet of nori at the bottom edge of the mat and spread a handful of rice along the nori's top edge. There is no need to leave a border for uramaki, so you will need to use a little more rice than for hosomaki.
- Spread the rice down to the nori's bottom edge in a thin uniform layer, being careful not to smash the rice.
- Sprinkle some Black sesame seeds onto the rice.
- Flip the rice over so the nori sheet is facing up, and lay 1 cucumber strip in the bottom half of the nori.
- Spread a line of spicy tuna from one side to the other.
- Flip the bottom edge of the mat up and over the filling until the rice makes contact with the nori on the other side.
- Pull the edge of the mat away from the rice and press the back of the mat to roll the seam to the bottom.
- Press the top, sides, and bottom of the roll using the mat to give the roll its shape, but do not squeeze it too hard.
- Check the headnotes for instructions on cutting the spicy tuna roll.


Nutrition Facts
Recipes in your inbox
I'll send you recipes and ideas to get you excited about cooking.
FAQ
This recipe uses raw tuna. Buy it from a retailer you trust and ask how it was handled for raw consumption, but remember that eating raw fish always carries some risk. People at higher risk of foodborne illness should avoid it.
The crunch in this recipe comes from cucumber and black sesame in the uramaki, while tobiko adds a small pop to the tuna. Fried onions, nuts, or crisp tempura bits are other options covered in the ingredient notes.
Too much filling is the usual culprit. Spread a thin, even layer of rice, leave a clean nori margin for hosomaki, roll the sushi onto its seam, and use enough pressure to make the rice adhere without squeezing out the filling. A long, sharp, damp knife will keep the roll intact when you slice it.
You can cut the nori, make the tezu, slice the cucumber, and wrap the mat ahead of time. Keep the tuna covered and refrigerated, then assemble the sushi close to serving because the nori softens as it sits.
The amount depends on how much rice and filling you use. In this recipe, one Hosomaki roll is about 250 calories, one Uramaki roll is about 300 calories, and one Gunkan piece is about 40 calories.
For Hosomaki or Uramaki, use a sheet of parchment paper or plastic wrap in place of a bamboo mat, although it is harder to apply even pressure from end to end. Gunkan can be shaped by hand and does not require a mat.



Lucas says
This article is amazing! Thank you for going so in-depth into the process and making it super understandable! 😁
Marc Matsumoto says
You're welcome Lucas, I'm glad it was helpful!
Jacqueline says
This is so great and the video is wonderful! Thanks for the detail within this post.
p.s. I noticed an incorrect word in the Tezu portion. In your 2nd to last sentence I think “rice” is supposed to be “water”. 🙂
Marc Matsumoto says
Hi Jacqueline, I'm glad to hear you this was helpful! Thanks so much for catching the typo. I've fixed it now😉